Enabling a full object view with just one camera.
360° Optics Tutorial
Contributed by | Opto Engineering
Many machine vision applications require a complete view of an object surface since many features to be inspected are located on the object sides rather than on its top.
Most cylindrical objects such as bottles and containers of different types, as well as many kinds of mechanical parts require an inspection of the side surfaces to detect scratches and impurities or to read a barcode or, again, to ensure that some writings have been correctly printed.
In cases like this, the most common approach is to use more cameras (usually 3 or 4) in order to achieve several side views of the part under inspection in addition to the standard top view. This solution, besides increasing the cost of the system, often leads to system performances limitation, since the electronics or software must manage different images coming from different cameras at the same time.
In many other cases, machine vision system engineers prefer to integrate a line camera to scan, line by line, the object outer surface. This approach also shows many technical and cost issues, since the object must be put in rotation by some expensive mechanism which will also affect the control speed; moreover, line-scan cameras require very powerful illumination while the width of linear detectors increase the optical system magnification, thus reducing the field depth.
For these reasons several integrators look for optical solutions allowing for single camera inspection without any need of part rotation.
Different types of optical set-ups make this possible: Pericentric lenses, Hole inspection optics, Catadioptric, multi-mirror systems and other kinds of optical probes and systems.

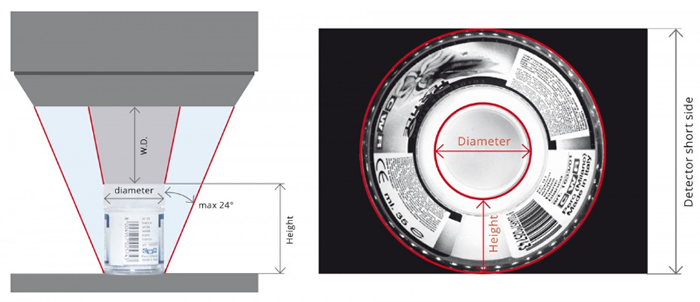
Pericentric lenses offer system integrators what they like most: a single image containing all the object features to be inspected; such image is often software unwrapped in order to obtain a straight view of the object and make image analysis even easier.

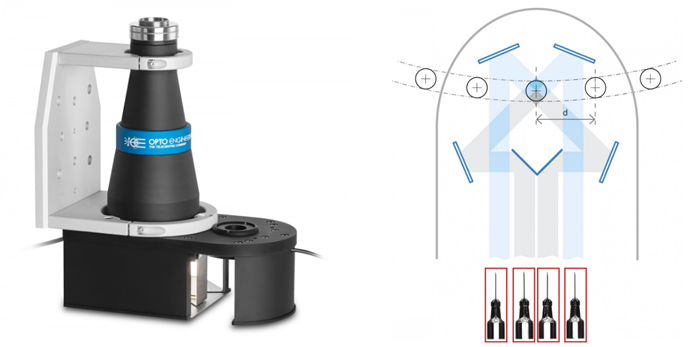
Outer surface inspection can benefit from optical techniques based on the use of multiple mirror systems.
An uncommon approach is to look at the object by means of a Telecentric lens through a mirror assembly surrounding the object.
Four or more different side views of the object can be obtained and, if mirrors are positioned in such a way to achieve the same optical path in each image, the focusing of the object will be perfect. The Telecentric lens will also ensure that the different images will feature exactly the same magnification and the same angle of view, thus allowing for perfect image matching software procedures; for this reason, this configuration will also be suitable for measurement purposes.
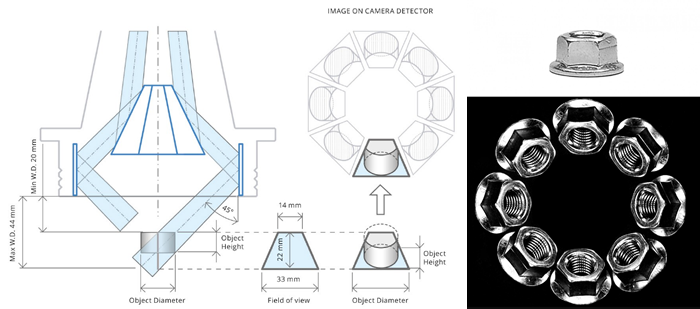
An optical solution offering some advantages of both Pericentric lenses and Telecentric lenses with mirror assemblies is given by Polyview optics. These multi-mirror optical systems provide multiple (4, 6, 8 or more) side views of the same object which is observed from a convenient perspective angle, which makes these optics suitable for both outer and inner (holes) surface inspection. All the side images are displayed in the same camera shot so that all the relevant information are found in the same picture, like in Pericentric lenses.
Polyview optics also grant very good image resolution and enable for high speed image acquisition, singe they can operate at low F/#s.
Optics for inner surface inspection
Polyview optics can efficiently operate to inspect the inner walls of a cavity. However, in some cases other solutions prove to be more efficient and compact. For example, when Hole inspection optics are used to inspect cavities, images similar to those provided by Pericentric lenses are achieved.
Like Pericentric lenses, Hole inspection optics are designed to comply with a curve field of view instead of a flat one: Hole inspection optics perfectly focus on cylindrical cavities, thus enabling for an efficient control of holes and containers surfaces. The wide perspective angle gives a detailed view of the surfaces without any need to put an optical probe inside the part.
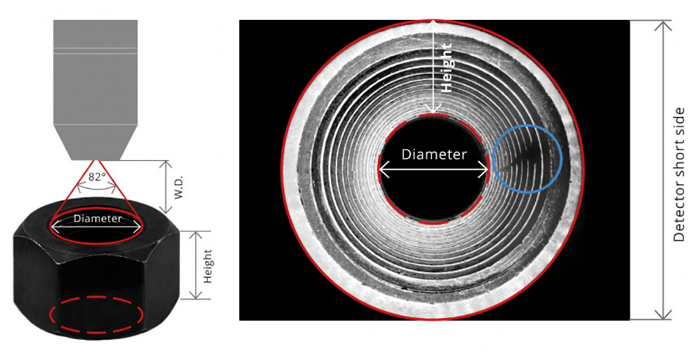

Hole inspection optics fit most applications, but do not allow for a perpendicular view of an hole surface which could be necessary when looking at certain threaded objects or when inspecting cavities where some relevant features would not appear if observed from the outside.
In cases like these, the insertion of an optical probe is necessary. A common approach is to use fiberoptic-based components, like fiberscopes, borescopes or other devices integrating bundles of coherent optical fibers to transfer the image from the cavity to the camera detector. Unfortunately such devices suffer from significant limitations due to the maximum number of fibers a bundle can contain, usually much less than the number of pixels of a low resolution camera. For this reason a direct optical coupling with the camera is preferred when high contrast images are essential: this can be provided by optical probes made of a special macro lens looking at the cavity walls through a spherical or aspherical mirror. Such solution makes the detection of small defects possible over a specific thickness range: if the inspection is limited to a certain hole height such optical probes make the scan of the cavity throughout its entire thickness unnecessary.
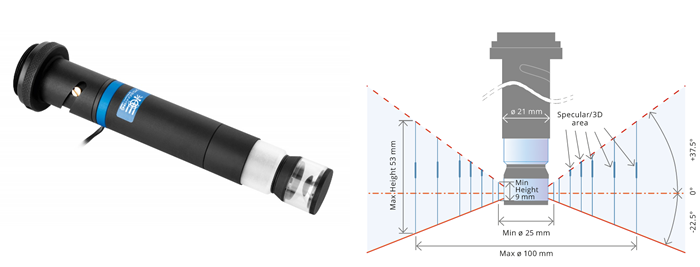
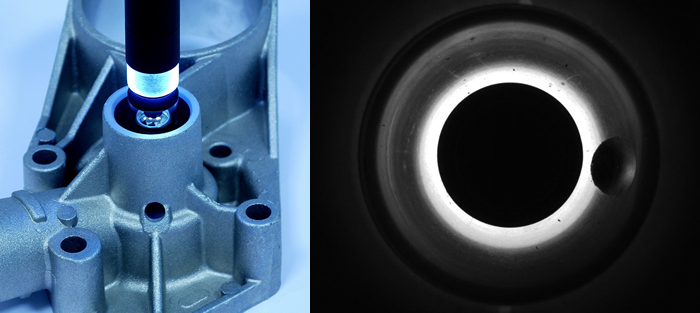
When defects inside a cavity become very small a much higher optical magnification is needed and a field of view consequently small must be inspected. Since only tiny portions of the surface can be inspected in a single camera shot, the probe must both scan the cavity height and be put in rotation to provide a full 360° view.
This kind of approach, besides requiring an accurate positioning system for the probe movement, also requires specific software algorithms for image matching, since the image of the cavity will be made of numerous different images obtained by scanning the surface around and through the hole depth.
The content & opinions in this article are the author’s and do not necessarily represent the views of RoboticsTomorrow
Comments (0)
This post does not have any comments. Be the first to leave a comment below.
Featured Product
