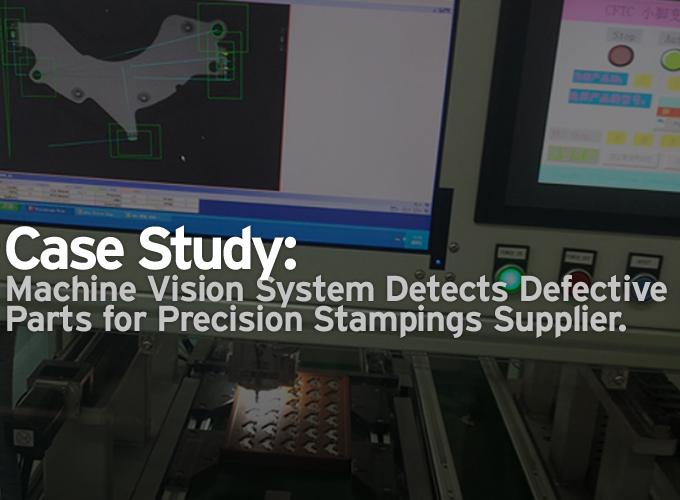
Dimensional measurement is an essential step in the manufacture of Hexins stamped parts in order to ensure that each workpiece meets required tolerances.
Company Profile
Jiaxing Hexin Precision Stamping Technology Co., Ltd., based south of Shanghai in China’s Zhejiang province, specializes in the manufacture of precision stamped components, including parts for consumer electronics, pneumatic tools, cutting tools, and automotive and general industrial parts. Continually focused on elevating its product quality to meet the most stringent customer quality requirements, Hexin is poised to become a premier supplier of precision stampings in Asia and throughout the world.
The Challenge
Dimensional measurement is an essential step in the manufacture of Hexin’s stamped parts in order to ensure that each workpiece meets required tolerances. Traditionally, this has been done with a contact measurement device such as a micrometer or other manual measuring tool. However, as customer requirements for part accuracy and production capacity increase, these manual inspection methods become problematic, resulting in low efficiency and high labor intensity. To address the demands of the growing consumer electronics industry, where a large number of stampings are used as mechanical parts in computer hard drives, mobile phones, and other devices, a more efficient automated inspection method is needed to meet the industry’s high quality standards for both mechanical dimensions and surface appearance, while also satisfying the large production capacity of these parts.

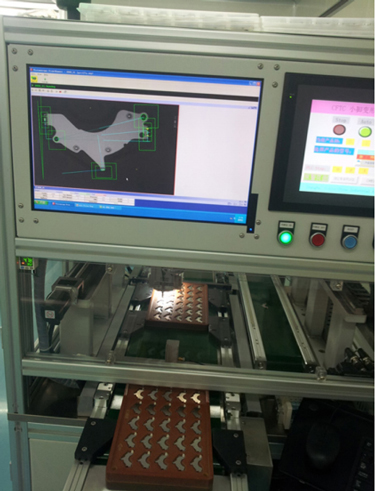
The line scan pin deformation measurement system, installed by Jiaxing Hexin Precision Stamping Technology Co., Ltd., takes dimensional measurements using Microscan Visionscape’s powerful toolset.
With production rates of 3,200 pieces per hour for a single production line and an acceptance rate of virtually 100% required by mobile phone and hard drive manufacturers (one defective piece per 120,000), 100% inspection of the components is necessary to ensure that all orders will be accepted by the end customer. A user return caused by a defective product is not only costly; it may also leave a negative impression of the manufacturer’s quality practices.
Through the course of undergoing several processes during production - especially after mechanical milling - some deformation of the pins on the stampings is inevitable. Stamping manufacturers use dimensional measurements to identify and reject defective units in order to prevent shipping them out. Done manually, all pieces are placed in a standard measuring tool one by one and determined to be acceptable or not. With daily production runs of 300,000 pieces typical for the industry, a large number of employees working around the clock are needed to meet required quantities.
The Solution
Compared to manual inspection, a machine vision system offers improved accuracy, high consistency, and works nonstop without fatigue. Well aware of these benefits, Hexin looked to Microscan partner Shanghai Vision Stone Industrial Automation Co., Ltd., to deliver an automated solution to strictly control product quality and prevent unnecessary return loss. Vision Stone provides customized machine vision and automation systems to address a broad range of user requirements.
In accordance with Hexin’s requirements for detecting pin deformation, Vision Stone developed a system incorporating a Microscan Visionscape® 0800 PCI board supporting line scan cameras in a system that can be integrated with a robotic arm. One by one, each 250x400mm tray containing 50 parts each is manually placed on a conveyor and processed once a sensor confirms that the tray is accurately positioned. With the Visionscape line-scan technology, scan rows can be set in accordance with the length of the users’ products (8K rows and 32M pixels per image as a default for 4K CameraLink). Imaging is accomplished in a cycle time of 1.5 seconds, resulting in a throughput rate of 2,400 pieces per hour. The results are then sent to a PLC through OPC with PC software. If there are any defective pieces, they will be immediately removed by the robotic arm. Once this inspection is complete, the tray is ejected and the next process starts.
Vision Stone utilizes Microscan’s Visionscape 0800 PCI Board, which offers a flexible interface for a complete range of analog and digital CameraLink cameras. These boards interface directly with Microscan’s Visionscape software, providing access to a range of intelligent tools for sophisticated machine vision applications. According to Vision Stone Vision Business Unit Manager, Han Lu, “Integrated with PLC and PC software, Visionscape platform enables Vision Stone’s Application Engineers to realize highperformance vision inspection without excessive external lines. When perfectly applied with Visionscape, Microscan 0800 PCI board line-scan imaging has measurement accuracy of 0.01mm/pixel.”
Conclusion
After installing Vision Stone’s automated line-scan pin deformation measurement system, Hexin is able to easily meet the strict requirements of its customers for product quality and production quantities, with the peace of mind that none of its shipments will be returned because of defective parts. An integral part of the solution, Microscan’s Visionscape software has the functionality and flexibility to satisfy the specialized requirements of the precision stamping industry. Looking forward, Vision Stone plans to collaborate with more companies in East China and offer its pin deformation inspection system as a standard solution in the Asia-Pacific region and other countries around the world.
Microscan’s Visionscape® is a comprehensive machine vision software that can be used on machine vision boards, GigE solutions, and smart cameras.
Founded in 1982, Microscan has a strong history of technology innovation which includes the invention of the first laser diode barcode scanner and the 2D symbology, Data Matrix. Today, Microscan remains a technology leader in automatic identification and machine vision with extensive solutions for ID tracking, traceability and inspection.
Microscan focuses on technologies of automatic identification (auto ID), machine vision, and illumination with application solutions ranging from basic barcode reading up to complex machine vision inspection, gauging, and measurement. Our solutions help manufacturers around the world drive down cost and waste, automate critical manufacturing processes, and increase yields.
The content & opinions in this article are the author’s and do not necessarily represent the views of RoboticsTomorrow
Comments (0)
This post does not have any comments. Be the first to leave a comment below.
Featured Product


